How do I create an Exchange Server data source in Drivve | Image?
Prerequisite
In order to create a Exchange Server data source, the Drivve | Image module
Exchange | Fax Connector (UEC) has to be licensed.
Supported Exchange Servers
- Microsoft Exchange 2003 (used together with WebDav)
- Microsoft Exchange 2007 (used together with WebDav or Exchange Web Services)
- Microsoft Exchange 2010 (used together with Exchange Web Services)
- Microsoft Exchange 2013 (used together with Exchange Web Services)
Before you can use an Exchange Server email field in a Drivve | Image profile, you have to create an Exchange server data source. Drivve | Image supports the following Exchange Server variants:
- Local Exchange Server
- Hosted Exchange Server (Office 365)
- Hosted Exchange Server (Office 365) with Active Directory synchronization
Note
An installation of software on the Exchange Server is not required. Http and Https are supported. Depending on the version of the Exchange Server, either WebDAV or Exchange Web Services have to be activated on the Exchange Server.
To create an Exchange Server data source, proceed as follows:
- Start the Drivve | Image configuration program.
- On the Tools menu, click Data sources.
The dialog Data Source is displayed.
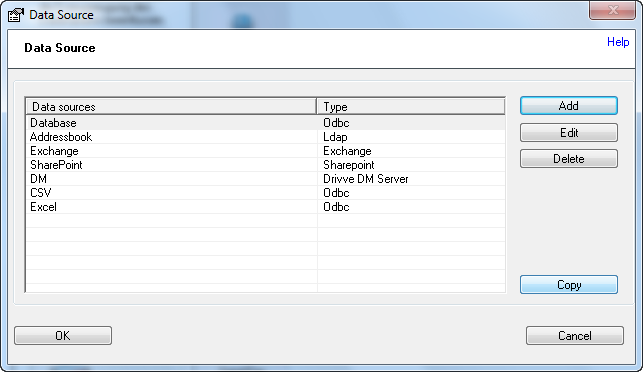
- Click the Add button to add a new data source.
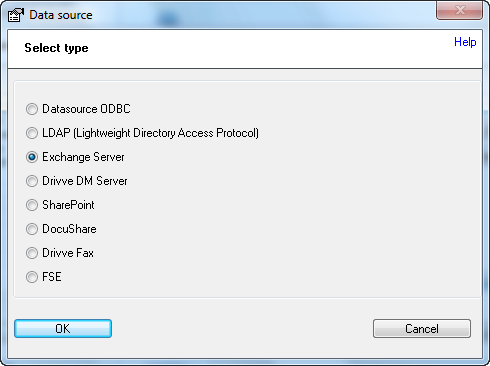
- Select the type Exchange Server and click OK.
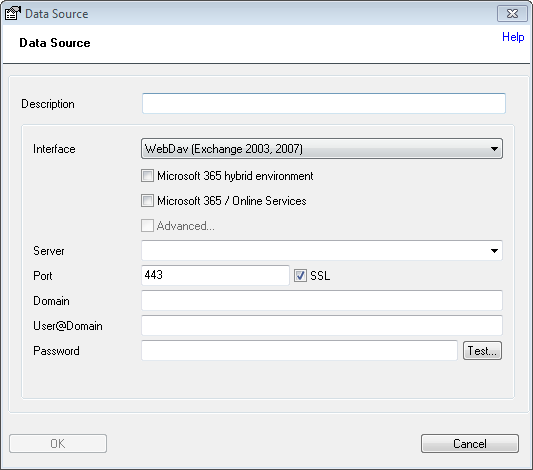
- Configure the required data source settings.
The following settings are available:
| Setting |
Details |
| Description |
Enter a name for the Exchange Server data source. |
| Interface |
Select the use Exchange Server type. |
| Microsoft 365 hybrid environment |
Tick this checkbox if your local Active Directory is synchronized with Office 365 (via Office 365 directory synchronization) |
| Is Microsoft Online Services Hosted Exchange Server |
Tick this checkbox if you are using a hosted Exchange Server (Microsoft Office 365). |
| Advanced |
Note
This field is only available if the checkbox Is Microsoft Online Services Hosted Exchange Server is ticked. Displays the fields Server, Port, SSL and Domain. |
| Server |
Enter the IP address or the name of the used server. |
| Port |
Displays the used port. Default port: 80 SSL port: 443 |
| SSL |
Tick this checkbox to send SSL encrypted emails. |
| Domain |
Enter the used domain. |
| User |
Enter the user name and the password of the user used for accessing the Exchange Server. |
| Password |
| Test |
See step 6. |
In the following section you will learn which settings to configure for the variants Local Exchange Server, Hosted Exchange Server (Office 365) and Hosted Exchange Server (Office 365) with Active Directory Synchronization.
Settings local Exchange Server
| Setting |
Details |
| Description |
Enter a name for the Exchange Server data source. |
| Interface |
Select the use Exchange Server type. |
| Server |
Enter the IP address or the name of the used server. |
| SSL |
Tick this checkbox to send SSL encrypted emails. |
| Domain |
Enter the name of the used domain. |
| User |
Enter the user name and the password of the user used for accessing the Exchange Server. |
| Password |
| Test |
See step 6. |
Settings Hosted Exchange Server (Office 365)
| Setting |
Details |
| Description |
Enter a name for the Exchange Server data source. |
| Is Microsoft Online Services Hosted Exchange Server |
Tick the checkbox. |
| User |
Enter the user name and the password of the user used for accessing the Exchange Server. |
| Password |
| Test |
See step 6. |
Settings Hosted Exchange Server Hosted Exchange Server (Office 365)with Active Directory synchronization
| Setting |
Details |
| Description |
Enter a name for the Exchange Server data source. |
| Microsoft 365 hybrid environment |
Tick the checkbox. |
| Is Microsoft Online Services Hosted Exchange Server |
Tick the checkbox. |
| User |
Enter the user name and the password of the user used for accessing the Exchange Server. |
| Password |
| Test |
See step 6. |
- Click the Test button to test the connection.
Drivve | Image now tries to send a test email via the selected server.
If a test email could be sent, a message is displayed.

Note: Sending the test email failed
If no test email could be sent, an error message is displayed. In this case, proceed as follows:
- Click OK to click the error message.
- Verify the settings you have configured and correct them if required.
- Click the Test button again.
- Click OK to confirm your settings.
- Click OK to close the dialog with data source list.