How do I automatically register Drivve | Image on a device?
Prerequisites: Required device settings
For some device types certain device settings are required before you install Drivve | Image on the device:
In order to select Drivve | Image profiles at the device display, the Drivve | Image application has to be registered on the device. The device has to be added to the Drivve | Image device management.
Proceed as follows:
- Start the Drivve | Image configuration program.
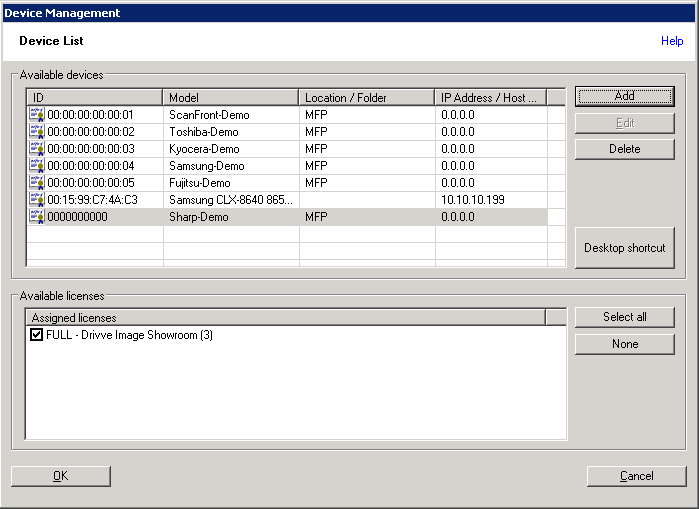
- On the Tools menu, click Device Management.
The dialog Device List is displayed.
- Click the Add button.
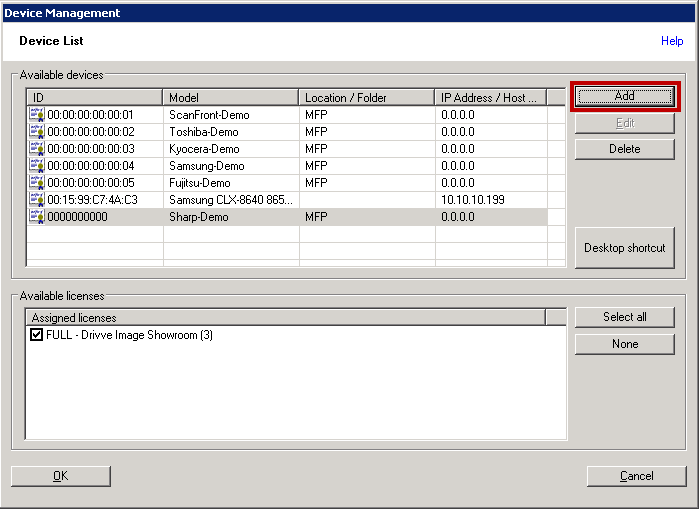
The dialog Add a device is displayed.
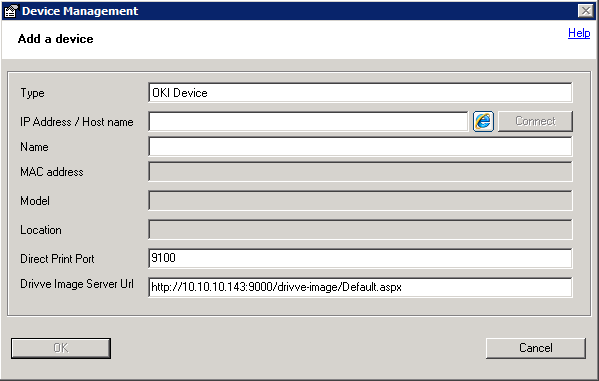
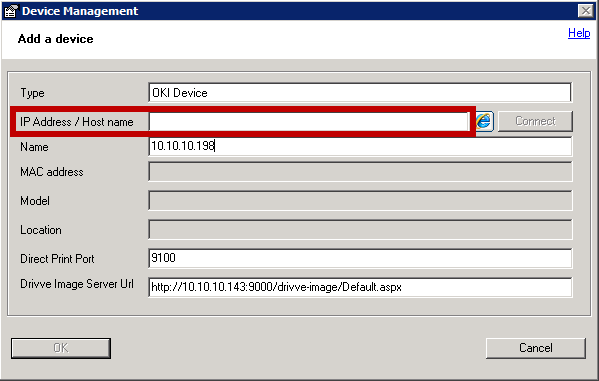
- In the field IP Address / Host name, enter the IP address or the host name of the device.
Note: Generic Edition
If you are using the Drivve | Image Generic Edition, you have to select the manufacturer of the device in the
Type field.
- Click the Connect button.
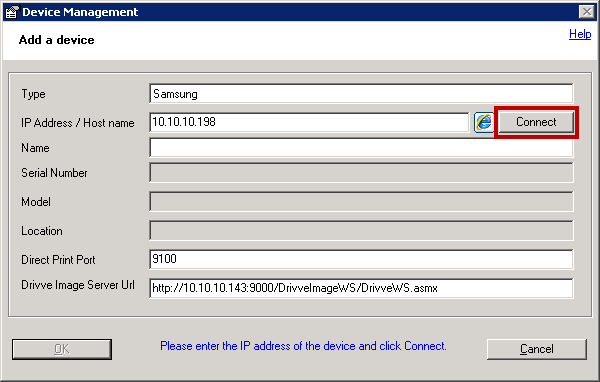
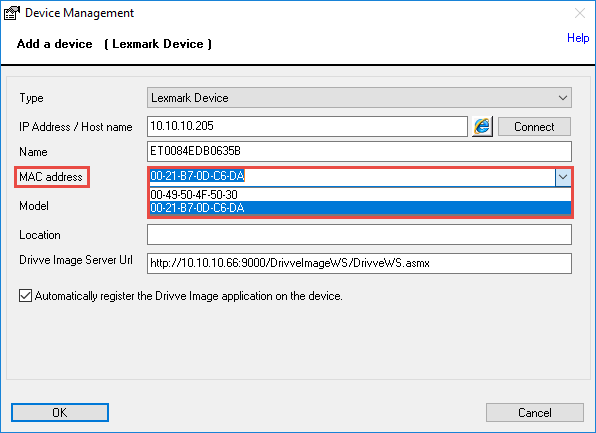
Drivve | Image now tries to connect to the device. If this is possible, additional device information (for example MAC address and model) are automatically entered into the corresponding fields of the dialog Add a device.
Note:
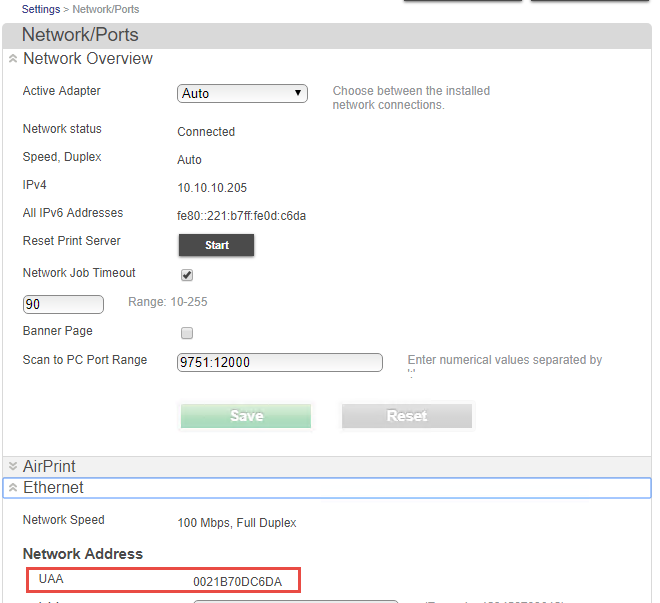
In some cases (e.g. some Lexmark eSF5 devices) more than one MAC address is returned. Make sure to select the correct MAC address. Usually this is the address shown on the device below the Ethernet settings.
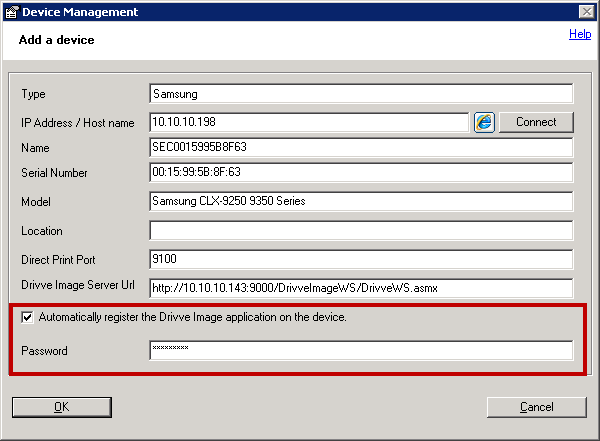
- Configure the following settings:
- Tick the checkbox Automatically register the Drivve Image application on the device.
- Enter the user name and the password - if available - into the fields User and Password.
Optional settings
The following overview shows the available optional settings:
| Setting |
Details |
| Checkbox "Auto Login" |
If Single Sign-on (SSO) is configured, enable the checkbox Auto Login. In this case, Drivve | Image checks whether the user entered matches the user in the LDAP directory. If this is the case, the user does not have to authenticate when he starts the Drivve | Image on the device display. |
Field "ExitURL"
(only available for OKI and Toshiba devices) |
For OKI and Toshiba devices, the field ExitURL is displayed. In this field, you can enter an URL which is opened if you leave the Drivve | Image application at the device. |
| Checkbox "Application" |
If you do not wish to use Drivve | Image to be used as the application name displayed at the device display, you can choose another name:
- Tick the checkbox Application.
- Enter the required name into the field to the right of the checkbox Application.
|
- Click OK.
The Drivve | Image application now is registered on the device. The dialog Add a device is closed. The newly registered device now appears in the list Available devices of the dialog Device List.
Manual registration
If the Drivve | Image application cannot be registered automatically, a corresponding message is displayed. Nevertheless, the device is added to the list
Available devices in the dialog
Device List.
Now, you have to assign a license to the device:
- In the list Available devices, click the device.
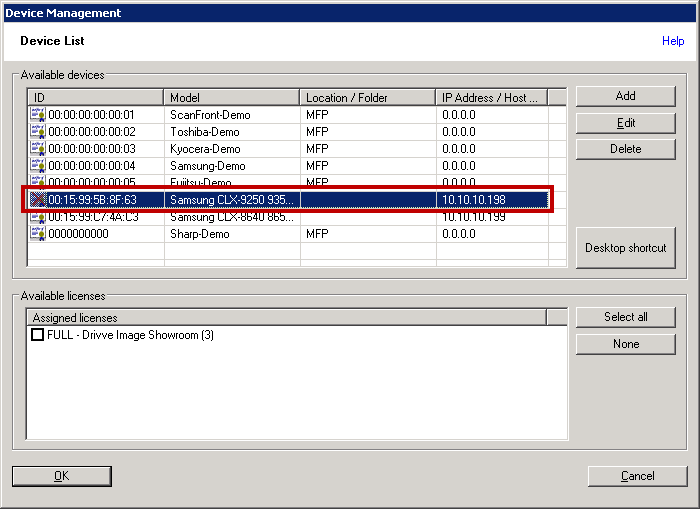
- Go to the list Available licenses and tick the checkbox of the license you want to assign.
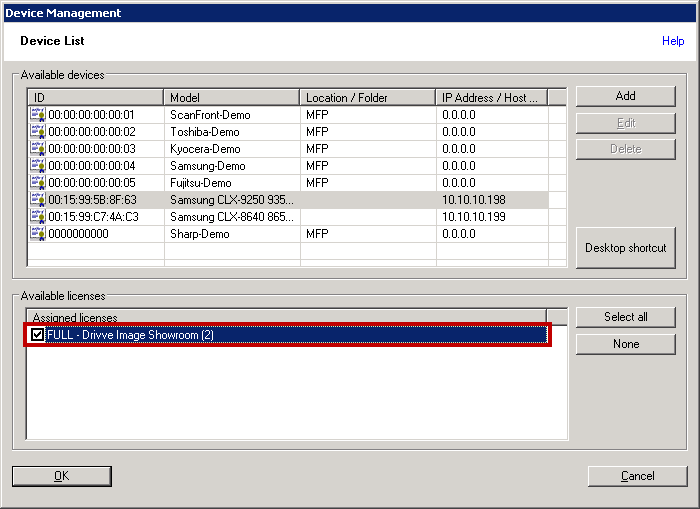
- Click OK.
The Drivve | Image application is now registered on the device.